
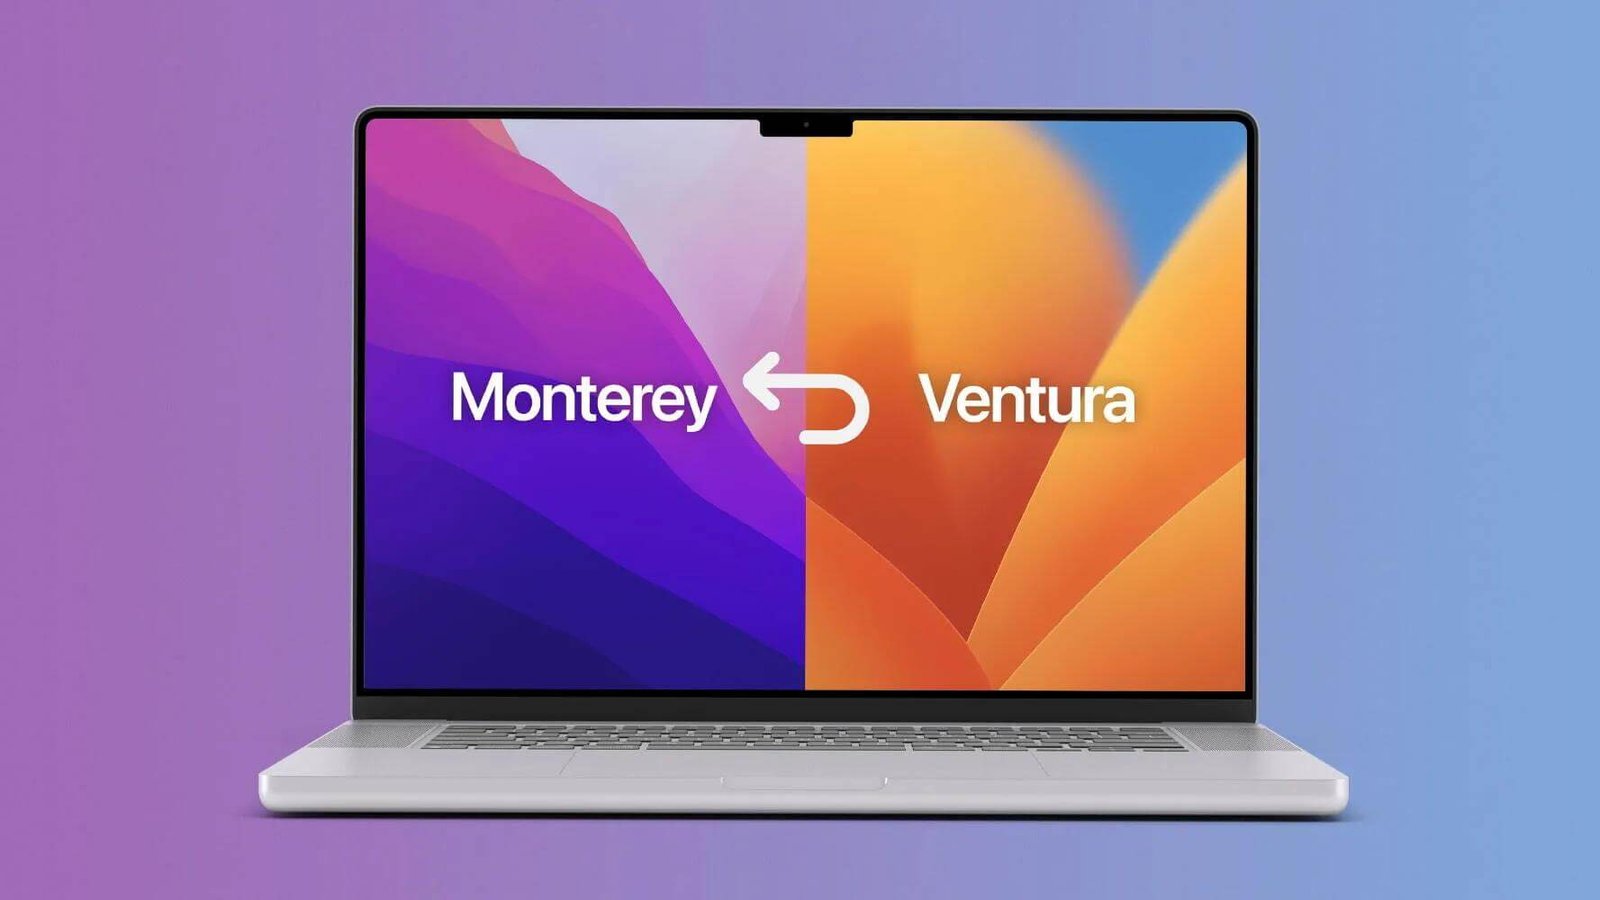
Being thrilled at the latest updated macOS 13 operating system — Ventura, you Mac users might go ahead of the rest to experience its fantastic features but realize that this newly developed system also comes with bugs that make it irritating to use. These bugs are usually reported to be stuck apps, battery drain, slow response, system freezing and crashing, etc.
Feel regret about the upgrade? Want to downgrade macOS Ventura to the more stable Monterey while worrying about data loss? Just walk through this article to learn how to safely revert from macOS 13 Ventura to macOS Monterey without losing data.
Suggestions before You Downgrade macOS 13 Ventura to macOS Monterey
Prior to seeking solutions on degrading macOS Ventura back to Monterey, some crucial preparatory work can’t be left out, which are listed as follows.
- Take a backup of your system data.
After macOS Ventura is downgraded to its previous build, all the system data will be erased forever. So, creating a backup of your current data is the key point to prevent losing data when degrading the macOS system. It is recommended to utilize the built-in Time Machine feature, an external USB drive, or an automatic cloud service to do the backup and manually restore data from the backups afterward. - Maintain a good Internet connection.
Make sure that your Mac is connected to a stable and relatively fast Wi-Fi or Ethernet. This is to avoid interference in the downgrade process from Ventura to Monterey. - Keep your Mac plugged into power.
The Mac to be degraded should be kept powered in, so that uninstalling macOS Ventura and reinstalling macOS Monterey can be done smoothly and free from disturb.
How to Downgrade macOS 13 Ventura to macOS Monterey Without Losing Data?
After the preparations mentioned above have been made, this section will deliver 4 feasible methods of downgrading macOS Ventura to Monterey with no data loss. Read on to pick the most suitable one for your case.
Method 1: Downgrade macOS Ventura to Monterey by Factory Reset
Suppose that the factory-shipped macOS version was Monterey, Mac factory reset is the easiest way to move back towards macOS Monterey from Ventura. If the Mac is restored to factory settings, its operating system is restored to the raw macOS build as well. Meanwhile, all the settings, media, and data on this Mac will be wiped off completely. Therefore, do remember to back up your data before downgrading. Below is the step-by-step guide for factory resetting.
- Click on the Apple icon at the top left corner of your Mac screen > select System Preferences.

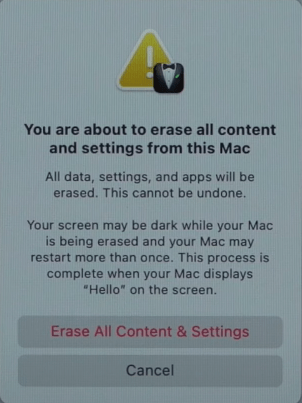
- Click the exact text again on the menu bar > choose to Erase All Content and Settings > enter your Mac user password to confirm.

- Click on the “Continue” button > enter your Apple ID password to sign out of your Apple ID.
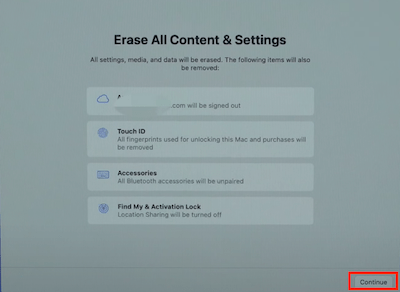
- Choose the red words “Erase All Content & Setting” to start factory resetting.
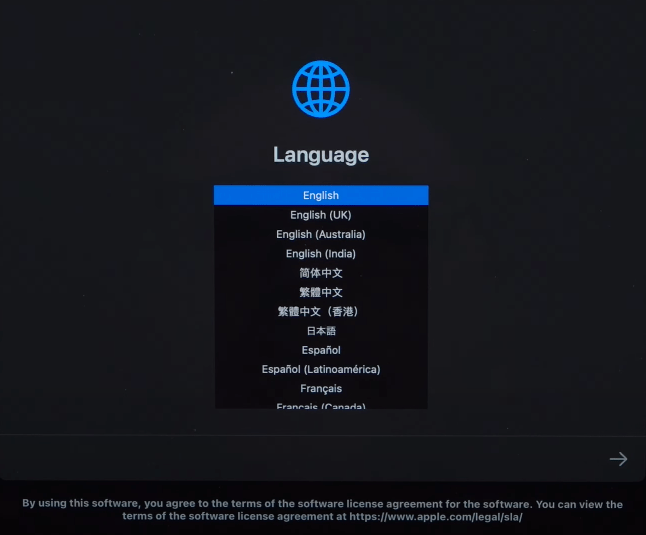
- Wait till the following interface appears. At this point, your macOS system has been degraded back to Monterey successfully.
If the operating system was not macOS Monterey originally, see below for other options to cope with the downgrade without data loss.
Method 2: Use Time Machine Backup to Downgrade macOS Ventura to Monterey
On condition that Monterey Time Machine backup has been enabled before upgrading to the macOS Ventura version, this method is achievable as the most straightforward one to roll back to Monterey. Otherwise, head for the rest 2 ways. Here’s the tutorial with Time Machine.
- Connect the Time Machine external drive to your Mac.
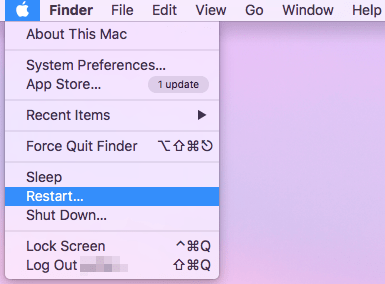
- From the Apple menu bar, click Restart.
- Go to the boot selection screen. This will vary depending on different Mac models.
- For Apple Silicon-based Mac: Hold down the power button until the startup screen shows. Then click Options > Continue.
- For Intel Mac: Keep pressing Command + R until the Apple logo appears.
- Choose Restore From Time Machine Backup > click the “Continue” button.

- Select the disk containing the Time Machine backup > click Connect icon.
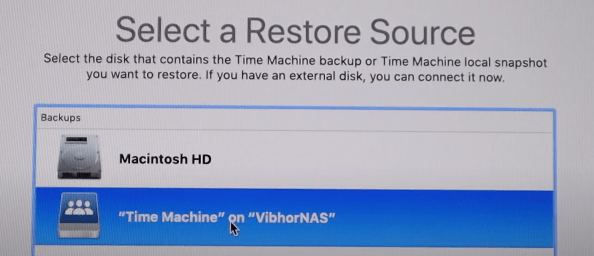
- Choose the recent macOS Monterey backup made before you install Ventura > click “Continue”. Finally wait patiently till the downgrade finishes.

Method 3: Downgrade macOS Ventura to Monterey with macOS Recovery Mode
Provided that Monterey Time Machine backup is unavailable, using macOS Recovery Mode is also a workable way to revert to macOS Monterey from Ventura within a few steps. Before you start, prepare a wired keyboard or your built-in keyboard, or plug a wireless keyboard into the Mac if possible. See below for the instructions.
- Shut down your Mac.
- To start up in macOS Recovery, press & hold one of the following 3 combinations on your keyboard as soon as you turn on the Mac again, until you see an Apple logo.
- Command + R: reinstall the latest macOS version installed on your Mac. In most cases, this is the recommended one.
- Option (Alt) + Command + R: upgrade your macOS to the latest version that’s compatible with the device.
- Shift + Option (Alt) + Command + R: reinstall the macOS version that came with your Mac or the closest version still available.

- Enter the firmware password or administrator password if prompted > click “Continue”.

- Choose Reinstall macOS > click “Continue”. Then follow the onscreen instructions.

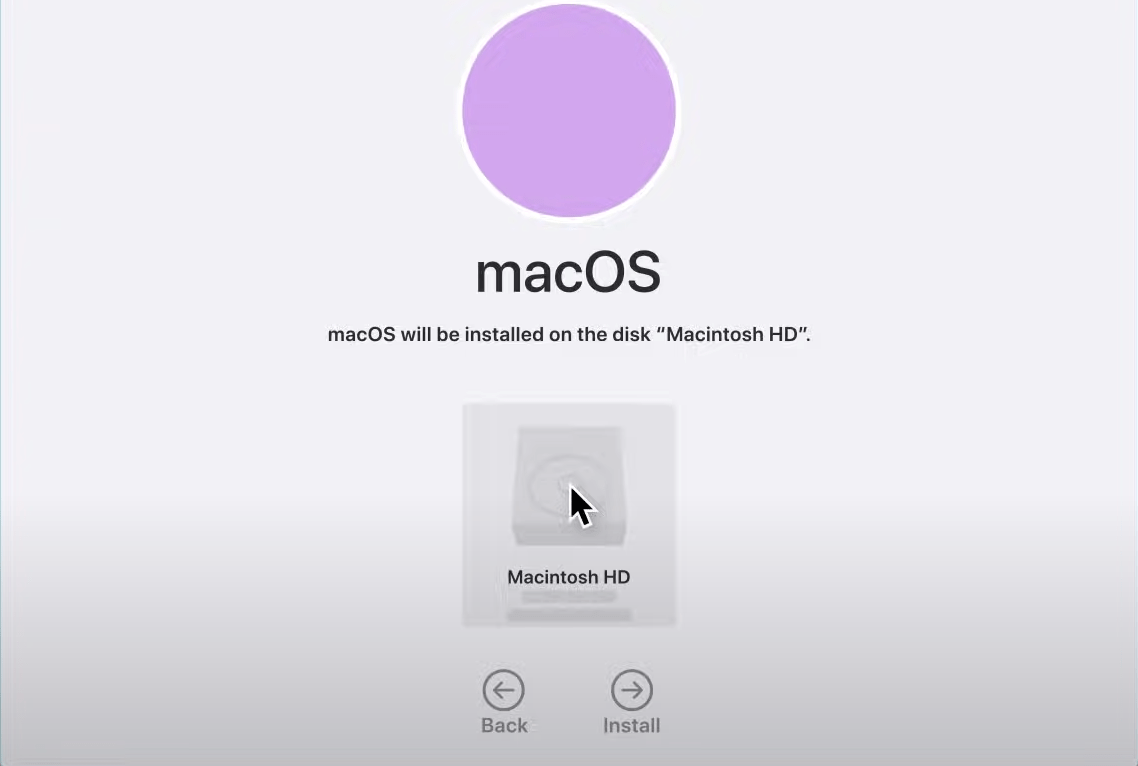
- Select the disk to flash. Now the downgrade begins.
The downgrade process might take a while. Bear in mind that do not put the Mac to sleep, turn it off or close the lid before the process is completed.
Method 4: Apply Bootable USB Installer to Downgrade to macOS Monterey from Ventura
Besides utilizing macOS Recovery Mode, another approach with no worry of losing data is to create a bootable drive to install macOS Monterey. With multiple steps, it would be possibly more complicated than the first three methods, but a higher success rate of downgrading is guaranteed. Let’s see how.
Step 1. Download macOS Monterey Installer.
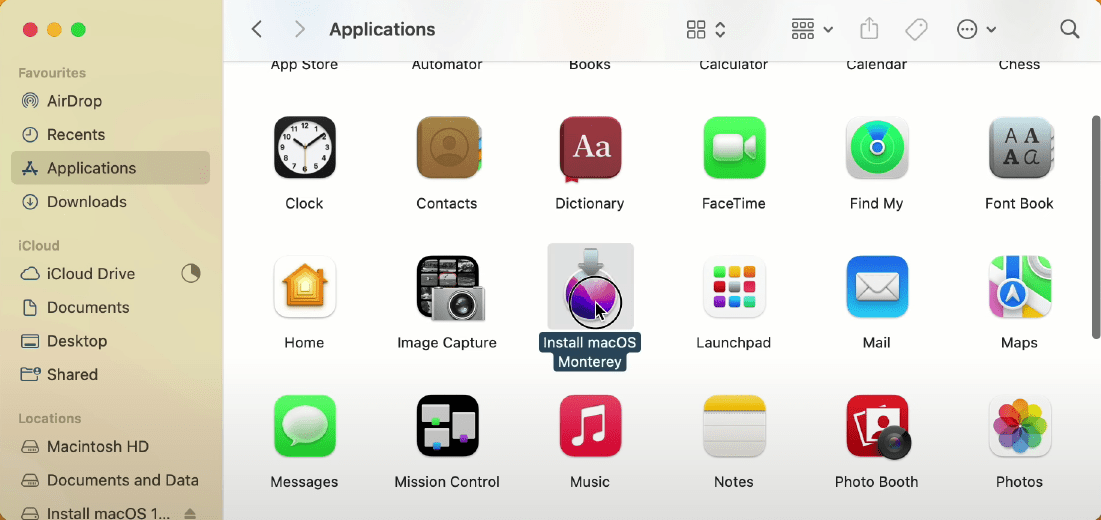
- Go to Mac App Store > search for macOS Monterey > hit “View” to open it > click the “Get” button to download it onto your Mac.

- Once the download is completed, the macOS Monterey installer will get into your Applications folder in the Finder. Leave it here for later use.
Step 2. Erase & prepare a bootable drive for macOS Monterey.
- Prepare a USB drive with at least 16GB storage space (a little bigger than over 12 GB macOS Monterey for the sake of security).
- Connect this external drive to your Mac system.
- Use Spotlight to locate and open Disk Utility.

- Go for the drive on the left sidebar under “External” > select “Erase” from the top toolbar.

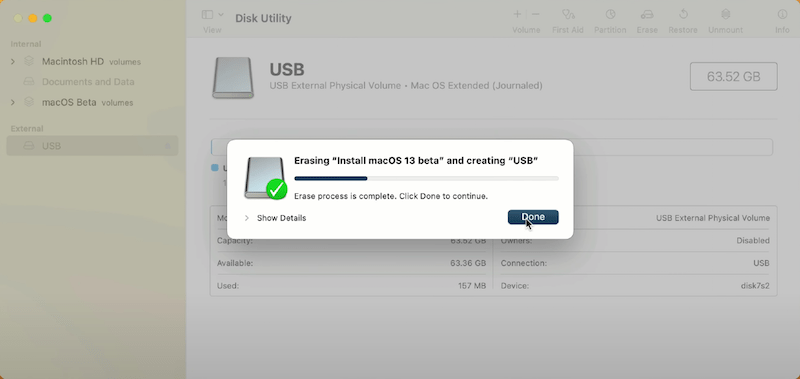
- A dialog box will pop up. Select “Mac OS Extended (Journaled)” as the format. Also, change the USB drive name to a simpler one for further use. Here we use “USB”. Then click the “Erase” button.

- When the message “Erase process is complete” comes out, you can click “Done” to continue. Now the USB drive has been prepared.
Step 3. Create a bootable drive.
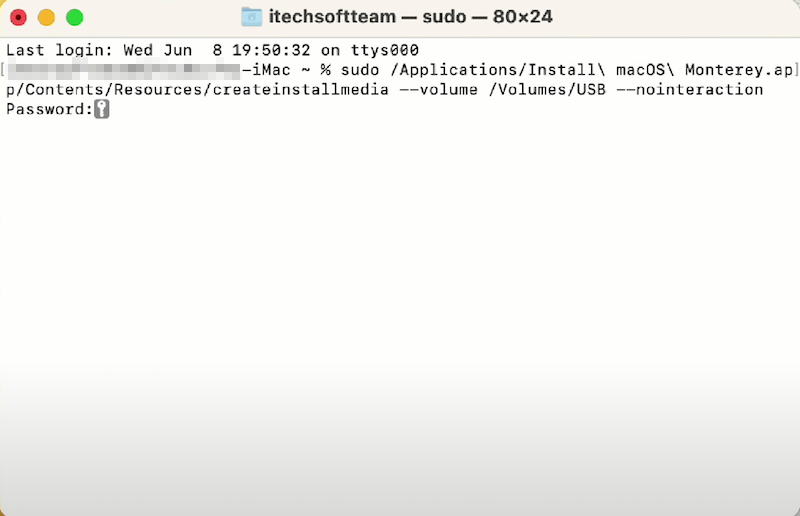
- Launch Terminal on the Mac using Spotlight.
- Copy and paste the command “sudo /Applications/Install macOS Monterey.app/Contents/Resources/createinstallmedia –volume /Volumes/USB –nointeraction” in the Terminal. You should keep the spaces and syntax all the same. Then press Enter to execute this command.
Please note that the “USB” in the command text represents the USB drive name. Replace it with the name of your own drive during actual operation.
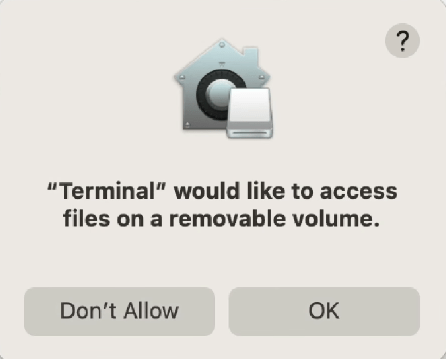
- Enter the password of your user account to erase the Mac. Click “OK” to allow access to your external USB drive.
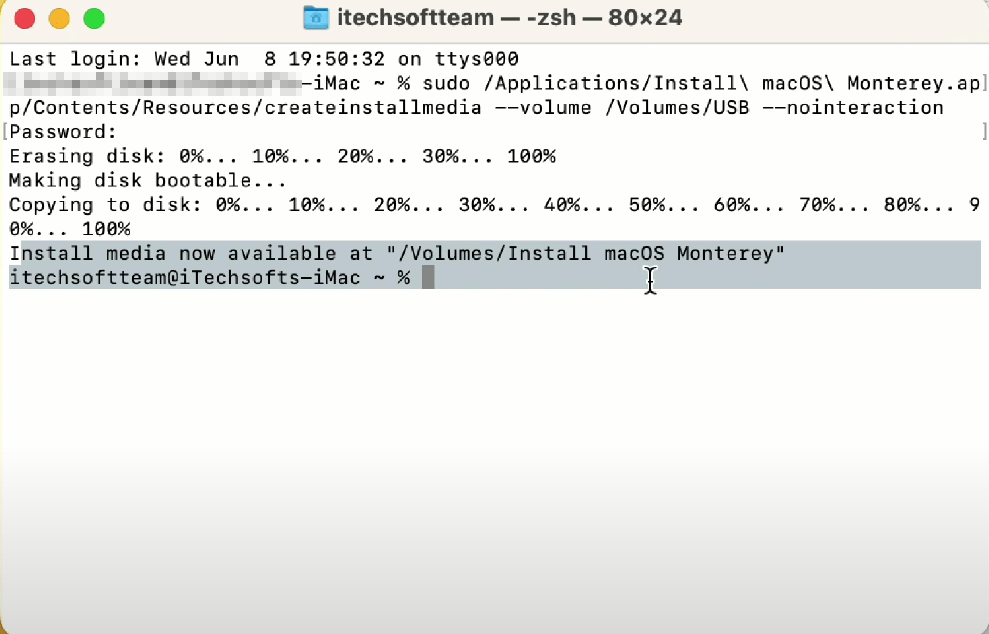
- The terminal will start to copy the macOS Monterey installation files to the USB drive. The message “Install media now available” indicates the copying has been completed. Then close the Terminal.
Step 4. Install macOS Monterey through the bootable drive.
- Turn off your Mac > boot the Mac into Recovery mode when starting up again. There are also 2 scenarios.
- For Apple Silicon M1 Mac: immediately hold the Power button until you see the installer drive on-screen with volumes.
- For Intel-based Mac: immediately hold down the Option (Alt) key to detect your installer drive.
- Choose “Install macOS Monterey” > click “Continue”.

- Select “macOS Beta” > click the “Next” icon > enter your user password to continue.

- Follow the prompts given by the system to install macOS Monterey on your Mac.

Once the installation finishes, congratulations, your system has been downgraded to Monterey successfully from macOS 13 Ventura.
What if You Lost Data after macOS Downgrade?
It is repeatedly stressed that useful data are supposed to be backed up before macOS downgrade for fear of losing them. However, data loss after the downgrade still happens, which may result from improper human actions or other unexpected situations occurring at any moment during the downgrading.
So what can we do if losing data after the macOS downgrade? A specialized third-party data recovery software must be your top priority.
Among the plethora of data recovery tools on the Internet, MacDeed Data Recovery deserves to be a nice choice. This software is capable of restoring files lost due to a variety of reasons, such as system upgrade/downgrade/reinstallation, unintentional format, malware attack, power surge, and so on. With a clear interface and straightforward operation, users could deal with any heavy-duty data retrieval with no need for professional knowledge of data recovery.
Here’s the guide on how to recover lost data after a macOS downgrade with no hassle.
Step 1. Free download and install MacDeed Data Recovery on Mac.
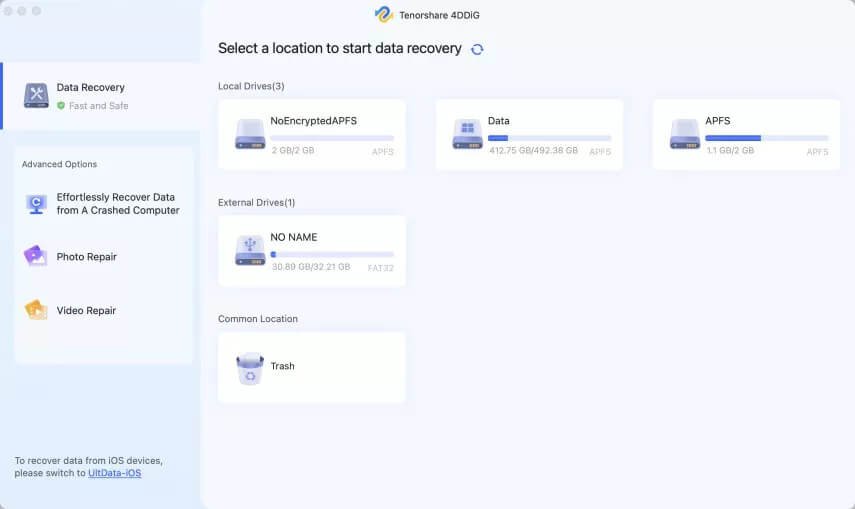
Step 2. Go to Data Recovery > select the Mac drive used to store your lost data > click the “Scan” button.
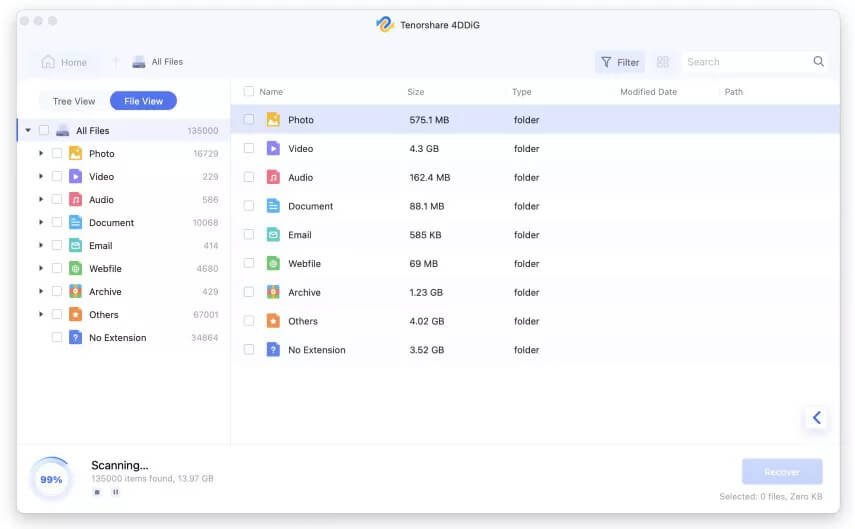
Step 3. After both a quick scan and a deep scan, recoverable items will be displayed at the left sidebar. Choose path or type to preview the found files. You can use the filter tools or search bar to quickly locate specific files.
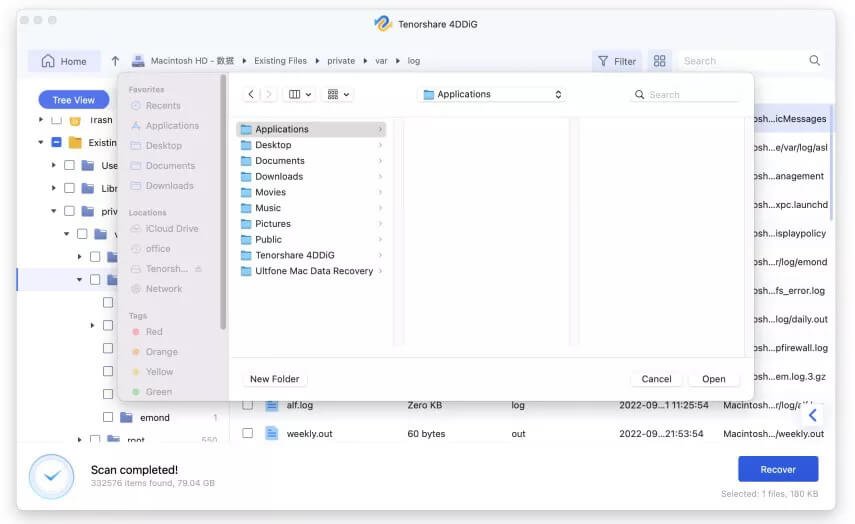
Step 4. Pick out your wanted files > and click the “Recover” button to restore them.
Conclusion
To downgrade macOS 13 Ventura to macOS Monterey, Mac factory reset, Time Machine backup, macOS Recovery mode, and bootable USB drive can be used according to different occasions. Backup initially is the key to doing the downgrade without losing data.
MacDeed Data Recovery – Lost Data after macOS Downgrade? Recover!
- Restore data lost due to macOS downgrade, upgrade, reinstallation
- Support recovery of 200+ file types: images, videos, audio, docs, archives, emails, etc.
- Rescue trash emptied, permanently deleted, formatted and missing files
- Retrieve data from both internal and external hard drives, performing equally well
- Directly search files with filter tools like keyword, file size, date created, and date modified
- Quick access to specific folders: Trash, Desktop, Documents, Downloads, Photos
- Preview recoverable items before recovery
- Scan records retained to resume scanning status at anytime
- Recover data to a local drive or Cloud platforms (Google Drive, Dropbox, One Drive, iCloud, Box, etc.)
- Compatible with macOS Monterey or earlier versions
If files are missing after the macOS downgrade, unfortunately, just try the helpful software — MacDeed Data Recovery to rescue them back.