Когато изтриете нежелани файлове от твърдия диск на вашия Mac, те ще бъдат преместени в кошчето и пак ще заемат място на вашия Mac. За да изтрием за постоянно тези нежелани файлове, можем да изпразним кошчето. Но може да получите съобщения за грешка, че Mac Trash не се изпразва по известни или неизвестни причини. Тук изброихме някои от решенията, които могат да ви помогнат да коригирате „Не мога да изпразня кошчето за mac“.
Общи решения за Mac Кошчето не се изпразва
Поради известна или неизвестна причина, поради която Mac Trash не се изпразва, има 2 общи решения за отстраняване на този проблем, повторете Empty Trash или рестартирайте Mac.
Повторете Изпразване на кошчето
Кошчето може да спре да работи и да замръзне поради различни вътрешни и външни фактори, но излизането от кошчето и повторното изпразване на кошчето понякога може да бъде лесно решение за този проблем. Просто излизаме от приложението и го връщаме към настройките по подразбиране за нова задача.
- Затворете кошчето, ако все още е отворено.
- След това щракнете с десния бутон върху иконата на кошчето и изберете Изпразване на кошчето.

- Потвърдете за Изпразване на кошчето и проверете дали вашето кошче може да бъде изпразнено на Mac.
Рестартирайте Mac
Когато рестартирате Mac, този процес ще изпразни активната RAM и ще стартира всичко от нулата до изчистване на грешки. Вашият Mac ще стане чист и бърз, като нов. Кошчето на Mac не се изпразва, грешката може да бъде изчистена чрез рестартиране на Mac.
- Затворете всички работещи приложения.
- Щракнете върху менюто на Apple и изберете Рестартиране.
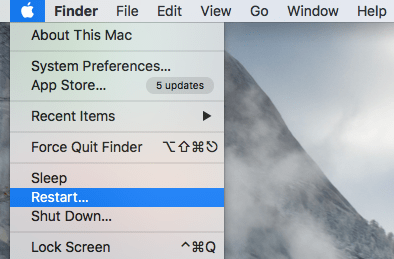
- След това отново изпразнете кошчето, за да проверите дали проблемът е отстранен.
Как да коригирате кошчето на Mac, което не изпразва файла при използване, заключва се, дискът е пълен и т.н.
Коригиране на Mac Trash Won't Empty File in Use
Ако не можете да премахнете файлове от кошчето и получите грешка за „Използван файл“, тогава вашият файл се използва от друго приложение или участва във фонов процес. Трябва да опитате да затворите приложението, което използва файла. Можете също така да затворите всички работещи приложения, за да сте сигурни, че файлът вече не се използва от нито едно от приложенията. След това опитайте отново да изпразните кошчето на Mac.
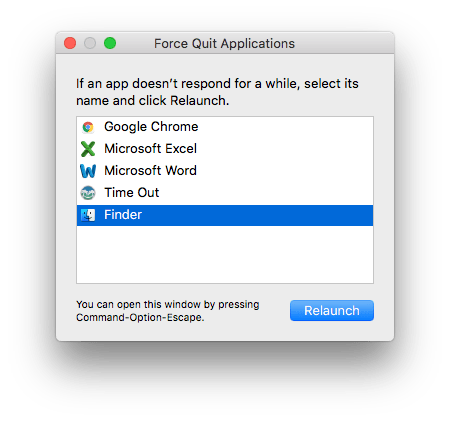
Коригирайте Mac Trash, който не изпразва заключен файл
Когато се опитате да премахнете файл, но за съжаление не сте успели и се казва: „Операцията не може да бъде завършена, защото елементът „(име на елемент)“ е заключен“. Ако файловете са заключени, трябва да ги отключите, преди да ги изтриете.
- В кошчето намерете заключения файл с икона за заключване.

- Щракнете с десния бутон върху файла и изберете Get Info.

- След това премахнете отметката от квадратчето преди Заключване.

- След това щракнете върху Изпразване, за да изпразните кошчето на Mac.
Коригирайте Mac Trash, който не изпразва файла без разрешения
Когато изпразвате кошчето на Mac, някои файлове може да са само за четене или да нямат достъп до тях и по този начин да спрат процеса на изпразване на кошчето. В този случай трябва да проверите всеки файл, за да сте сигурни, че всички файлове са достъпни и записваеми, в противен случай трябва да промените разрешенията на файла за премахване.
- Щракнете с десния бутон върху файл в кошчето и изберете Получаване на информация.
- Ще видите „Споделяне и разрешения“, изберете стрелката, за да падате опциите, щракнете върху вашето текущо потребителско име, за да проверите разрешенията за файлове, и след това коригирайте опцията за разрешения на „Четене и запис“.

Коригирайте кошчето за Mac, което не се изпразва, защото дискът е пълен
Ако получите съобщение за грешка „Операцията не може да бъде завършена, защото дискът е пълен.“, вместо да архивирате, изтривате и преинсталирате, ви препоръчваме да стартирате вашия Mac в безопасен режим и да изпразните кошчето отново.
Безопасният режим на macOS се използва за диагностициране и отстраняване на проблеми, когато вашият Mac не работи правилно. Освен това зарежда само необходимите разширения на ядрото, предотвратява автоматичното отваряне на елементи за стартиране и влизане и изтрива системните и други кеш файлове, което помага да ускорите вашия Mac и да освободите малко място. Ето защо безопасният режим може да коригира Mac Trash Won't Empty, когато дискът ви е пълен.
Стартирайте в безопасен режим на Intel Mac
- Натиснете бутона за захранване и след това натиснете и задръжте клавиша Shift, докато стартира.
- След като се покаже прозорецът за влизане, отпуснете Shift и влезте.
- Сега можете отново да изпразните кошчето.
Стартирайте в безопасен режим на Apple Silicon Mac
- Натиснете и задръжте бутона за захранване, докато видите опциите за стартиране.
- Изберете стартов диск.
- Натиснете и задръжте клавиша Shift и изберете Продължете в безопасен режим, отпуснете клавиша Shift.
- След това отново изпразнете кошчето си.

Коригирайте Mac Trash, който не изпразва резервните копия на Time Machine
Mac Trash няма да изпразни резервните копия на машината на времето и получава съобщението „някои елементи в кошчето не могат да бъдат изтрити поради защита на целостта на системата“ понякога, в този случай ще трябва временно да деактивирате защитата на целостта на системата.
- Стартирайте или рестартирайте вашия Mac, докато държите Command+R, за да стартирате в режим на възстановяване.
- Освободете клавишите, когато се появи логото на Apple и влезте.
- Изберете Помощни програми>Терминал и въведете командата „csrutil disable; рестартиране”.
- Натиснете Return и изчакайте рестартирането.
- SIP е временно деактивиран, сега можете да изпразните резервните копия на машината на времето в кошчето.
- След това рестартирайте вашия Mac в режим на възстановяване отново и следвайте гореспоменатите стъпки, за да въведете командата „csrutil enable; рестартиране“ в терминала, за да активирате SIP отново.
Коригирайте Mac Trash Take Forever до Empty
Ако отнема цяла вечност изпразването на кошчето ви на Mac, това може да е причинено от големи данни за изтриване, остаряла macOS или злонамерен софтуер.
Ако имате няколко GB данни, които трябва да бъдат изпразнени от кошчето ви, трябва принудително да прекратите процеса на изтриване и да направите изтриването няколко пъти, вместо да изпразвате веднъж завинаги, просто изберете част от тях и ги изтрийте завинаги на партиди.
Ако файловете в кошчето ви не са с голям капацитет, трябва да проверите дали вашият macOS е актуален. По-стара версия на macOS ще забави вашия Mac и ще повлияе на неговата производителност.
Ако сте инсталирали антивирусна програма, стартирайте я и стартирайте сканиране на вашия Mac, за да проверите дали вирус наранява вашия Mac.
Най-доброто решение: Принудително изпразване на кошчето на Mac
Има много помощни приложения на трети страни, които могат принудително да изпразнят папката „Кошче“, но аз лично не препоръчвам нито едно от тях тук, защото те в крайна сметка използват команди на терминала, за да изтрият файлове от кошчето, а ние можем да го направим ръчно. Използването на терминал за изпразване на кошчето е най-доброто решение, което трябва да вземете, само ако всичко по-горе е неуспешно. Тъй като тези команди ще изтрият заключените файлове, без да ви предупреждават за нищо. Бъдете много внимателни, когато правите това, или направете резервно копие на вашите Mac файлове, преди да ги изтриете, ако е необходимо.
- Отворете терминал на вашия Mac, като отидете на Приложения > Помощни програми > Терминал.
- Сега въведете „
cd ~/.Trash” и натиснете клавиша „Назад”.

- Сега въведете „
sudo rm –R”, последвано от интервал. Оставянето на място е задължително и не натискайте бутона „Връщане“ тук.
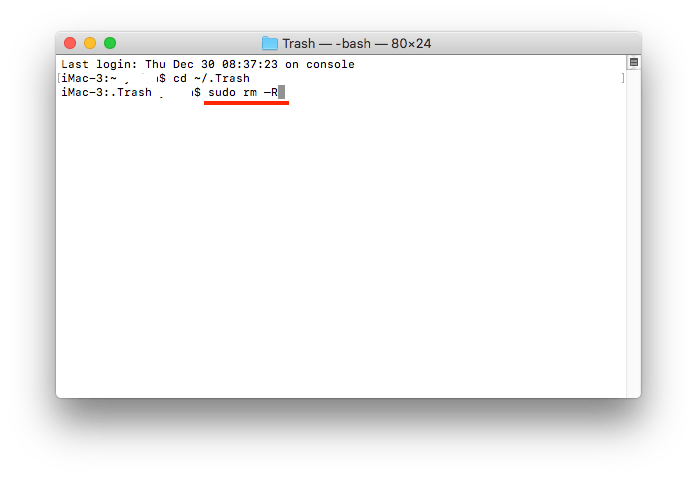
- След това отворете папката Кошче от Dock. Изберете всички файлове от папката Кошче, плъзнете ги и ги пуснете в прозореца на терминала. Тази стъпка ще добави пътя на всеки файл към командата „Премахване“, която въведохме по-горе.

- Сега можете да натиснете бутона „Връщане“ и след това да въведете администраторската си парола, за да изпразните принудително кошчето на Mac.

Това най-добро решение ще изтрие файлове за постоянно от кошчето без възстановяване, което означава, че веднъж изтритите файлове няма да бъдат възстановени.
Какво става, ако кошчето е изпразнено по погрешка? Възстанови!
По погрешка сте изпразнили всички файлове в кошчето си и искате да възстановите някои от тях? Много по-лесно е, отколкото си мислите, защото има налични програми за възстановяване на данни за Mac, за да ги върнете, като напр MacDeed Възстановяване на данни .
MacDeed Data Recovery е програма за Mac, предназначена да възстановява файлове, изгубени поради различни причини, включително, но не само, изпразнено кошче, постоянно изтриване, форматиране, изключване и вирус. Той не само възстановява файлове от вътрешния твърд диск на Mac, но също така възстановява данни от външни устройства за съхранение, включително HDD, SD карта, USB флаш устройство и др.
MacDeed Data Recovery за Mac
- Както бързото сканиране, така и дълбокото сканиране се прилагат за възстановяване на файлове, изгубени при различни ситуации
- Възстановете файлове от вътрешни и външни устройства за съхранение
- Възстановете 200+ вида файлове: видео, музика, изображение, документ, архив и др.
- Сканирайте бързо и може да бъде възобновено по-късно
- Прегледайте възстановими файлове, за да възстановите само желаните файлове
- Пакетно изберете възстановими данни с едно щракване
- Много лесен за използване
Опитай безплатно Опитай безплатно
Как да възстановите изпразнени файлове в кошчето на Mac?
Стъпка 1. Изтеглете и инсталирайте MacDeed Data Recovery на вашия Mac.
Стъпка 2. Отворете програмата и отидете на Възстановяване на данни.
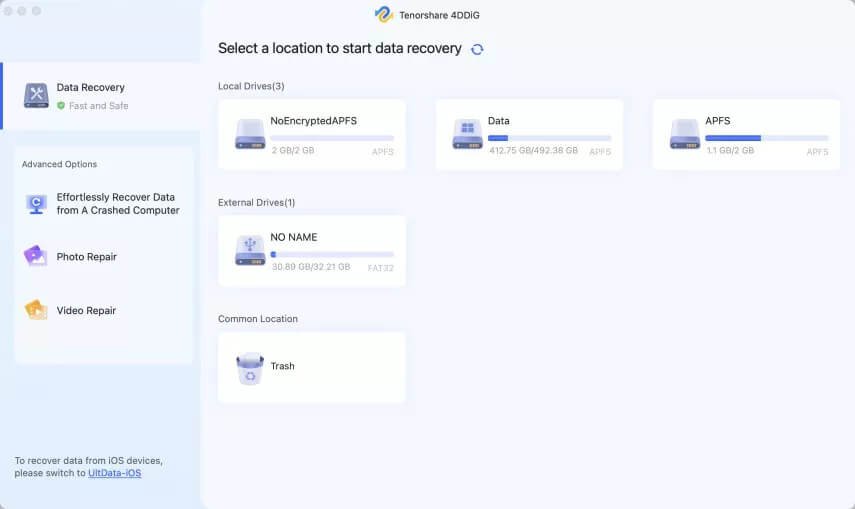
Стъпка 3. След това изберете устройството, където искате да възстановите изпразнените файлове от кошчето. Щракнете върху „Сканиране“, за да започнете да сканирате изтритите файлове в кошчето.
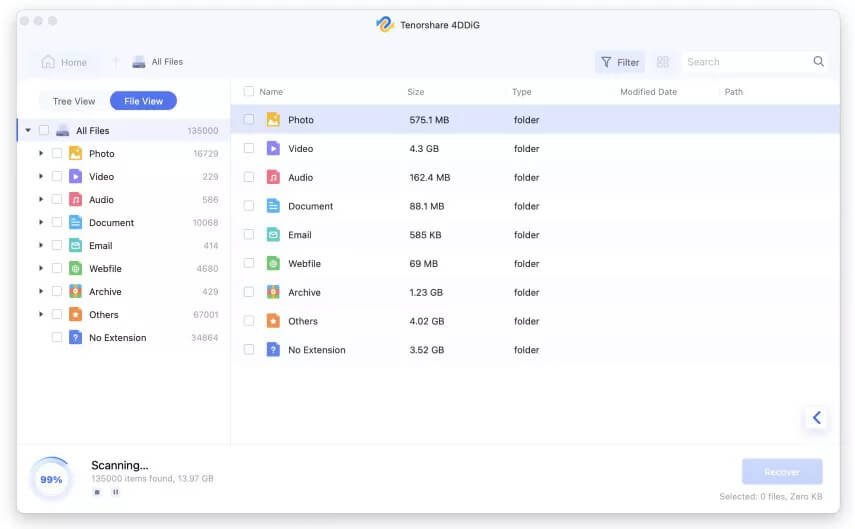
Стъпка 4. Прегледайте файловете, които искате да възстановите, и ги изберете, като поставите отметка в квадратчето.
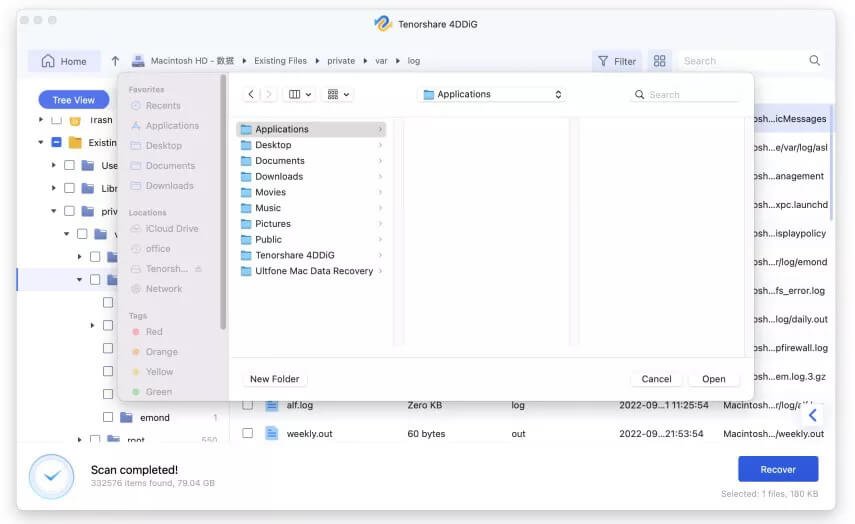
Стъпка 5. Щракнете върху Възстановяване, за да върнете изпразнените кошчета обратно на вашия Mac.
Заключение
Поради известни или неизвестни причини, поради които Mac Trash Won't Empty, принудителното изпразване на кошчето винаги е най-доброто решение за отстраняването му. Но за да избегнем подобни проблеми, винаги трябва да поддържаме нашата macOS актуализирана до момента, да архивираме и да я почистваме редовно, за да сме сигурни, че винаги е в добро състояние, за да изпълнява гладко всяка задача.
Възстановяване на файлове от изпразнено кошче
- Възстановете файлове от различни вътрешни/външни твърди дискове на mac
- Възстановете 200+ вида файлове: видео, аудио, изображения, документи и др.
- Извличане на файлове, изгубени поради форматиране, изтриване, актуализация на системата и др.
- Използвайте както режим на бързо сканиране, така и режим на дълбоко сканиране, за да възстановите файлове за различни ситуации на загуба на данни
- Търсете бързо файлове с инструмента за филтриране
- Визуализирайте файловете преди възстановяване
- Висок процент на възстановяване
- Възстановете файлове на локално устройство или облачна платформа

