I deleted some necessary files by mistake, how can I get the deleted files back on Mac? Is it possible to recover deleted files on Mac after emptying Trash?
When browsing the Apple Support Community, we can easily find many users talking about similar file recovery-related problems. Here is a comprehensive summary of how to recover deleted files on Mac.
Contents
How to Recover Deleted Files on Mac without Additional Software
Although Apple doesn’t offer to undelete button to restore deleted files, there are so many possibilities to recover deleted files on Mac without software. You can follow the below guides to recover the deleted files before they are gone for good.
Recover Deleted Files on Mac from Trash
When you delete files on Mac, they always go to the Trash bin. So if the files have been deleted recently, there is a chance that the files could be in the Trash and you can recover deleted files from the Trash.
Step 1. Click the Trash icon in Dock.
Step 2. Preview and find the recently deleted files in Trash.
Step 3. Just right-click on the items in the Trash and then choose “Put Back”. The deleted files will be restored to their original folder.

If you want to recover deleted photos and music on Mac, the steps are different. Check the guide below.
Recover Deleted Photos on Mac
If you have deleted photos from the Photos app on your Mac, then you can’t find them in the Trash bin. When you delete photos from the Photos app in less than 30 days, you can recover deleted photos on Mac from the Recently Deleted Folder. Go to Recently Deleted Album, you’ll see a list of photos you’ve deleted, and select the photos you want to recover, at last click the Recover button at the top right.

If you have deleted photos in more than 30 days, your photos will be erased. You can only recover them from backup or using Mac photo recovery software – MacDeed Data Recovery.
MacDeed Data Recovery: Recover Accidentally Deleted Files on Mac
- Recover photos, audio, documents, videos, email, and other files on Mac
- Support recovering data from corrupted, formatted, and damaged hard drive
- Support all kinds of devices like external HDD, SD card, USB drive, SSD, iPod, etc
- 100% safe and free for you to find and preview deleted files on Mac
- Use both quick and deep scan mode
- Save scan status to resume recovery without re-scanning
- Search lost data quickly by filter tool
- High recovery rate
- Recover files to a local drive or Cloud platforms
Recover Deleted Music Files on Mac
When you delete Music from the iTunes library, they are usually moved to Trash or kept in the iTunes Media folder. If the music files are deleted to Trash, you can directly drag them to the desktop. In iTunes, choose Preference in the iTunes menu, navigate to the Advanced tab and make sure there is a tick in the box marked ‘Copy files to iTunes Media folder when adding to the library.

Then click File from the iTunes menu bar to choose “Add to Library…” and select the recovered music files, at last, all deleted music files will reappear in your iTunes library.

Recover Deleted Files on Mac using Terminal
- Open the Terminal application on your Mac.
- Type in the following Terminal command:
cd.Trash. Hit Return. - Then type in the name of the file you would like to recover using the following command: mv xxx. Replace the “xxx” part with the full name of the file you deleted. Hit the “Return”.
- Type Quit in the Terminal and press the “Command” and “F” keys simultaneously to launch the Finder.
- Enter the name of the deleted file in the search bar.
- Click on the file you found in Finder and drag it onto your desktop or the location you wish to save the file. Then close the window.

Recover Deleted Files on Mac from Time Machine
If you have turned on Time Machine, you may have backed up the files between your last edit (if any were recent) and deleted them. Follow the below guide to recover deleted files on Mac even from emptied Trash by using Time Machine.
Step 1. Click the Time Machine icon in the menu bar and choose “Enter Time Machine”.
Step 2. A window pops up and you can use the arrows and timeline to browse the local snapshots and backups.
Step 3. Find the deleted files you want and then click “Restore” to recover deleted files to their original location.

Recover Deleted Files on Mac from Other Backups
If you have uploaded the files before deleted to online cloud storage services like iCloud Drive and Dropbox or cloned your drives regularly as an extra backup insurance policy, then your files may still be there. You can go to the cloud website or check the cloned copies and search for deleted files, and then select and restore them.
However, if none of the above ways works, you still can follow the guide below to recover deleted files from your Mac. And you must stop using your Mac to store new data immediately since the deleted files are overwritten by new data, and it will be impossible to recover them.
Fast Way to Recover Deleted Files on Mac from Emptied Trash Bin
However, to recover deleted files on Mac, more and more users prefer a piece of professional data recovery program. Those solutions without using software won’t work all the time, especially when your Trash Bin is emptied, or your deleted files are hidden deeply. And in fact, a dedicated Mac Data Recovery app is always the best choice for users, if they want to recover their deleted files successfully.
MacDeed Data Recovery, in terms of capability and efficiency to recover deleted files, is the best pick for mac users. It is designed to recover deleted photos, emails, videos, and other documents from Macs, hard drives, flash drives, memory cards, etc. In addition, it is easy to use and can fast recover your deleted files. With MacDeed Data Recovery, you can:
- Recover deleted files under any situation: from emptied Trash, deleted by using “Cmd + Shift + Del” button, deleted by choosing “Empty Trash”, accidentally power-off and more;
- Recover more than 200 unique file formats: pictures, videos, audio, emails, documents, folders, archives, etc.
- Recover from any storage devices & disk formats: Mac hard drives, external hard drives, Mac notebooks, desktops, Mac servers, USB drives, camcorders, memory cards, SD cards, digital cameras, mobile phones, laptops, MP3/MP4 players, and more;
- Recover data in 3 steps with 30X faster speed;
- Allow to check and preview the found data to select specific files for recovering;
- 100% clean and only require read-only access to devices.
- Free lifetime upgrade…
Steps to recover deleted files on Mac
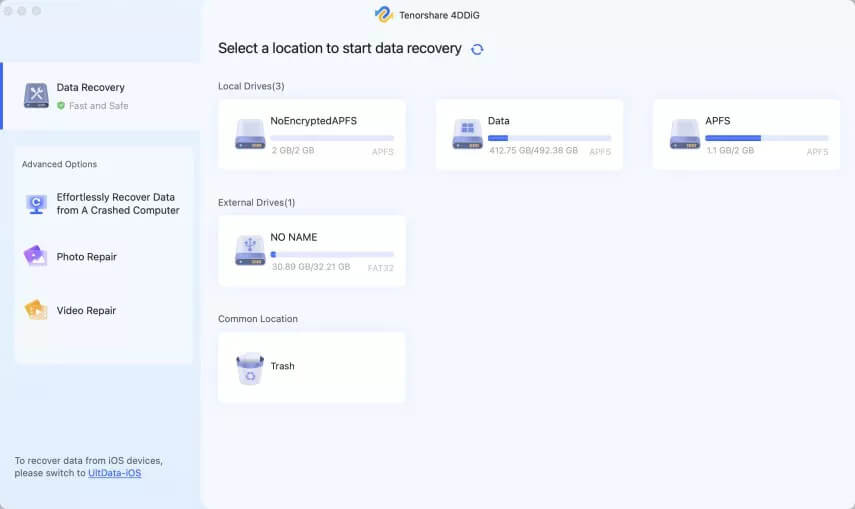
Step 1. Launch MacDeed Data Recovery.

Step 2. Select the drive to find deleted files from emptied Trash.
Select the drive that you need to recover deleted files from and then click the “Scan” button to start scanning.

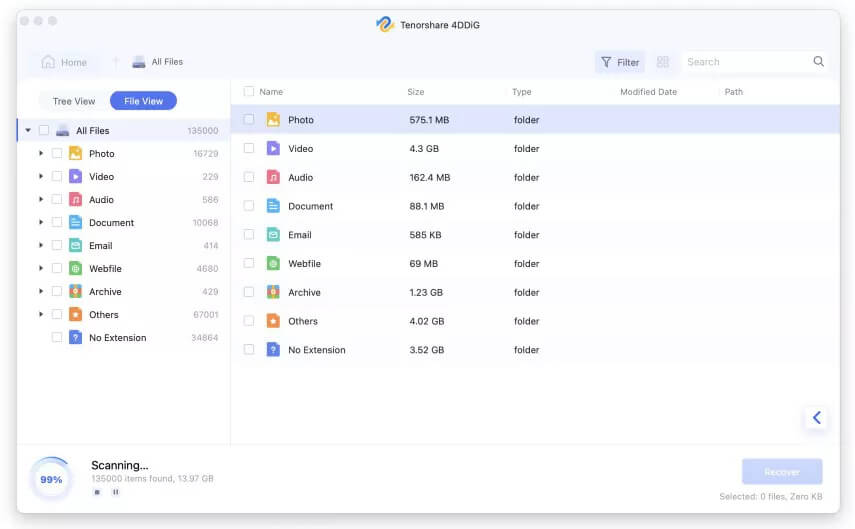
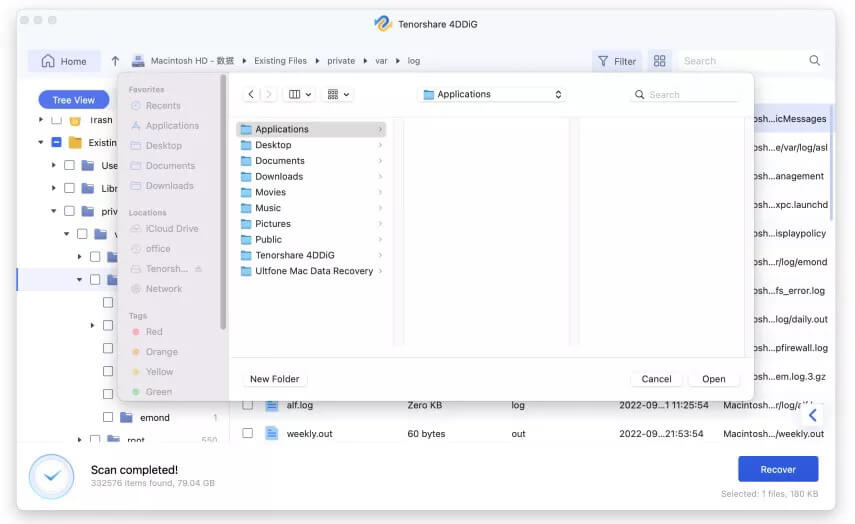
Step 3. Preview and recover deleted files on Mac.
When data recovery is done scanning, you will be shown a list of the files it has found. When you find a potential file, use the preview feature to know if the file is fully recoverable. Once you have selected your files, select the location where you want to store the recovered files and then click the “Recover” button.

Congratulations! You now know how to restore & recover deleted files on Mac.
FAQ about How to Recover Deleted Files on Mac
Q: What situations can lead to data loss?
A: There are many situations that can lead to data loss, such as accidental deletion, securely emptied Trash, mistaken operation, permanently deleted files by using the “Cmd + Shift + Del” button, unplanned formatting, power surges, etc. And there is no need to get worried when you lose Mac files either from hard drives or from Trash, this is because all those deleted or lost files can be easily recovered.
Q: Why is it possible to recover deleted files on Mac?
A: When you delete some important Mac files by mistake, it doesn’t mean you lose them permanently; you just remove the entry of the file from the hard drive directory instead of the file itself. It continues existing on your hard drive, even after you empty it from the Trash Bin.
As long as new files have not overwritten your deleted files, there is a good chance that you can recover them on Mac with some third-party file recovery software like MacDeed Data Recovery.
Q: Is there a recently deleted folder on Mac?
A: In the Photos app, there is a Recently Deleted folder that stores photos deleted in less than 30 days. When you delete documents, music, and other files on Mac, they are moved to Trash. You can restore them anytime as long as the Trash has not been emptied.
Q: How to recover deleted files with free software?
A: Many users want to recover deleted files for free. For Windows users, there is some free data recovery software like Recuva. But for Mac users, there are none. Many Mac data recovery software claims to be free, but they only allow you to recover files with limited size and features. So buying a full version of Mac data recovery is unavoidable.
Q: How do I recover permanently deleted photos from Mac?
A: You can try MacDeed Data Recovery to scan and recover permanently deleted pictures on Mac. And this app also allows you to recover other permanently deleted files like documents, videos, music files, etc.
Q: How to recover deleted photos from a memory card?
A: First, you need to connect your memory card to your Mac via a card reader. Second, open MacDeed Data Recovery and choose scan mode, then select the memory card for scanning. Third, preview all found photos and select the ones you need to recover. At last, tap the Recover button. These steps can also be available for any external storage device like an SD card, USB drive, or external hard drive.
Q: Where are recovered Word files stored on Mac?
A: MacDeed Data Recovery allows you to store the recovered files in a specific location.
Q: How do I recover overwritten files on Mac?
A: If you have turned on Time Machine backup or use an internet-hosted backup system, like Crashplan or Backblaze, you may have one or more previous versions of the file or even the latest version stored. Then you can find the version you want and restore it after overwriting.
Things You Should Remember to Protect your Mac
- Always shut down your Mac properly cause that abrupt shutdown leads to physical and logical damage.
- Download any third-party apps from reliable resources to avoid virus attacks.
- Install a reliable antivirus app to protect your Mac system from external threats.
- Turn on the firewall to block any unwanted incoming network connections. Navigate to System Preferences > Security & Privacy > Firewall tab, and click the padlock icon at the bottom left to unlock system settings. Then click the Turn On Firewall button. You can click Firewall Options to make changes.
- Back up Mac files to other places or upload them to the cloud. You can also clone the whole hard drive for backup.
- When using external storage devices like SD cards, external hard drives, and USB drives, eject them properly.
- If you always use Mac in public places, there are more things you should pay attention to.

