SD Card is designed to extend memory capacity for portable and mobile devices, such as digital video camcorders, digital cameras, audio players, and mobile phones…Therefore, SD cards are widely used and it is much more likely that any one of us just has an SD card inserted in our device.
We use SD cards so often that it becomes common that us lost files from SD cards due to various reasons. Whatever the reason, there is no need to panic. With a range of solutions available, we are here to help you recover deleted files, especially photos, from your SD Card on Mac.
Contents
Best Trick to Recover Deleted Files from SD Card on Mac
We all hope it never happens, but we just got the SD card files mistakenly deleted on Mac and lost them. You might have tried to find back the deleted files from Mac Trash but found nothing, because deleted SD card files won’t be moved to Mac Trash like the way deleted files on Mac start-up drive are moved to Trash and can be put back. We need a professional data recovery tool to restore the deleted files from the SD card.
Luckily, there are so many tools available and MacDeed Data Recovery is the best from a definitive list of top data recovery programs.
MacDeed Data Recovery makes data recovery easy, combing quick scan and deep scan to find the most deleted files from both internal and external storage devices, with a full set of features, like file filter, file preview, recovery to the cloud, etc to speed up and simplify the overall recovery process.
It offers the most comprehensive data recovery solution for all kinds of data loss scenarios: deleting, formatting, system crash, os upgrade or downgrade, partition or repartition, virus attack, and other known or unknown reasons. It supports recovering 1000+ types of files, including videos, audio, images, documents, emails, archives, or others from a Mac, Mac external hard drive, USB drive, SD card, media player, and so on.
How to Recover Deleted Files (Photos) from SD Card on Mac?
Step 1. Download and install MacDeed Data Recovery.

Step 2. Connect the SD Card to your Mac using a card reader.
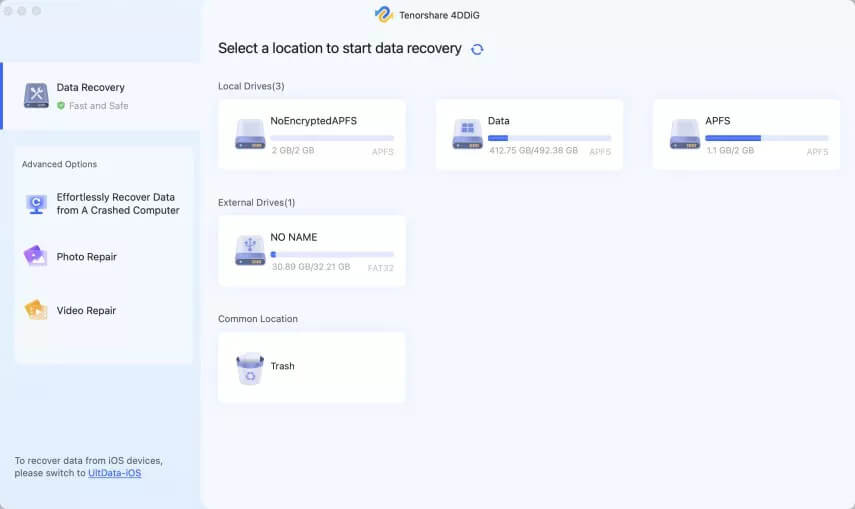
Step 3. Run MacDeed Data Recovery and choose the SD Card to start scanning.

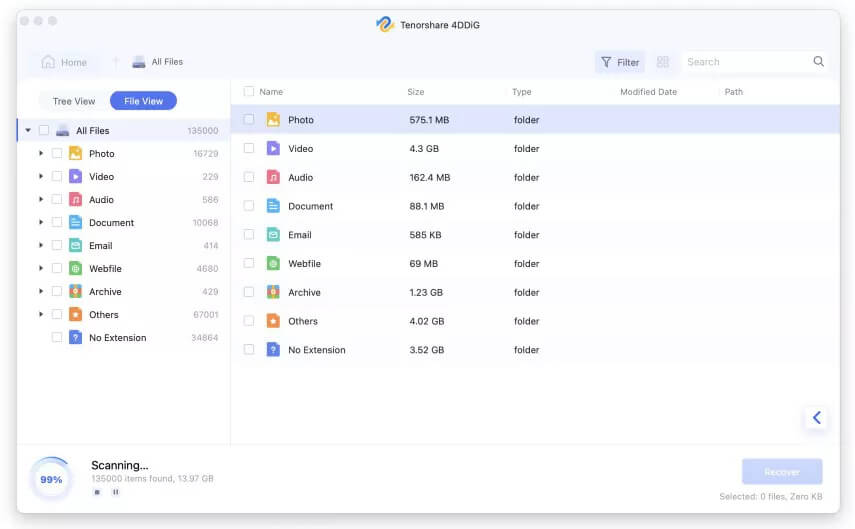
Step 4. All the found files will be listed. To recover deleted photos from the SD card on your Mac, you can go to All Files >Photo, search by photo name, and double-click on the photo to preview it before recovery.
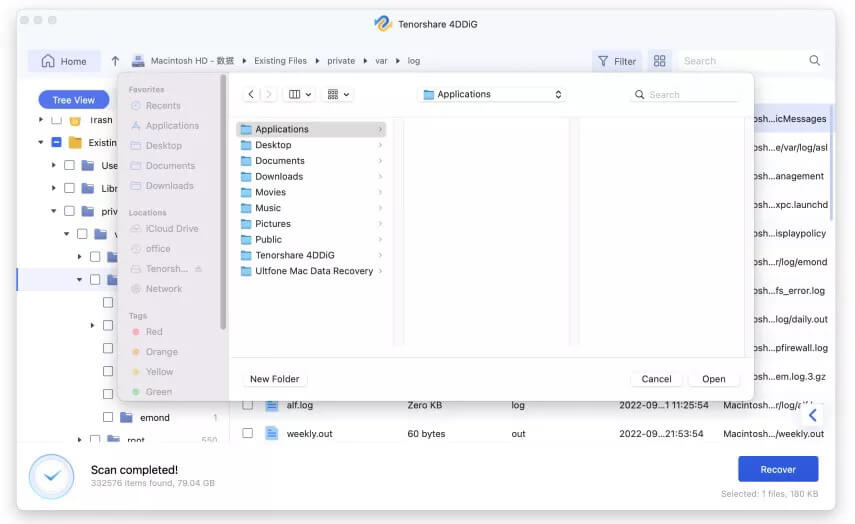
Step 5. Select all the files you want to restore and click on Recover to get them back to the local drive or to the cloud.

Recover Files from SD Card on Mac Using Terminal
Speaking of recovering files with Terminal, you may be wondering if it works. Actually, with Terminal alone, you can recover deleted files from Mac trash only, you won’t be able to recover deleted files from an SD Card. But with the help of PhotoRec, we will be able to do this.
PhotoRec is an open-source data recovery program for Mac users, it uses the command line to recover more than 400 types of files, ranging from photos, videos, and archives to documents. It is not easy to use, and even though you don’t have to know much about command lines, you need to input and move between the codes carefully, any errors will lead to failure recovery.
How to Recover Deleted Files from SD Card on Mac with Terminal?
- Download and install PhotoRec on your Mac.
- Insert the SD Card into your Mac or connect with a card reader.
- Launch the program with Terminal, you need to enter your Mac password to continue.

- Select the SD Card where you want to restore deleted files on Mac and press Enter.

- Choose Partition type and press Enter.
- Choose File System and press Enter.
- Choose the output folder to save the restored files from the SD card and press C to start the process. Then check the folder to view the recovered SD Card photos or other files.

Which SD Card You Are Using? It Has Data Recovery Software Too
Which SD Card brand you are using? It is much more likely you will use one of these brands: SanDisk, Lexar, Transcend, Samsung, and Sony. If your SD Card is produced by these manufacturers, then you can search on their official websites and check if they offer data recovery software for lost files on your SD Card. For example, SanDisk recommends using its SanDisk Rescue for data retrieval. Here we will take SanDisk as an example to recover deleted photos from SD Card on Mac. Surely, it supports recovering other files, like documents, emails, videos, music, database, archives, etc.
How to Recover Deleted Photos from SD Card on Mac?
- Download and install SanDisk RescuePro Deluxe on your Mac.
- Insert the SD Card into your Mac or connect with a card reader.
- Launch the program, and select an action, here we choose Recover Photos.

- Select the SD Card and click Start to start the scanning.

- Preview the photos and put them back on your local drive or SD Card.

How to Recover Files from SD Card on Mac with Backup?
If you have a good habit of backing up files regularly, it should be pointed out that we can recover deleted files from SD Card on Mac with a backup.
Most Mac users will prefer to back up files with Time Machine or save a copy in iCloud, if you have done this, you can refer to the following steps to recover the deleted SD card files.
Recover Files from SD Card on Mac with Time Machine Backup
- Connect the external hard drive that you use to back up files with Time Machine to Mac.
- Click on Apple Menu and go to System Preferences>Time Machine.
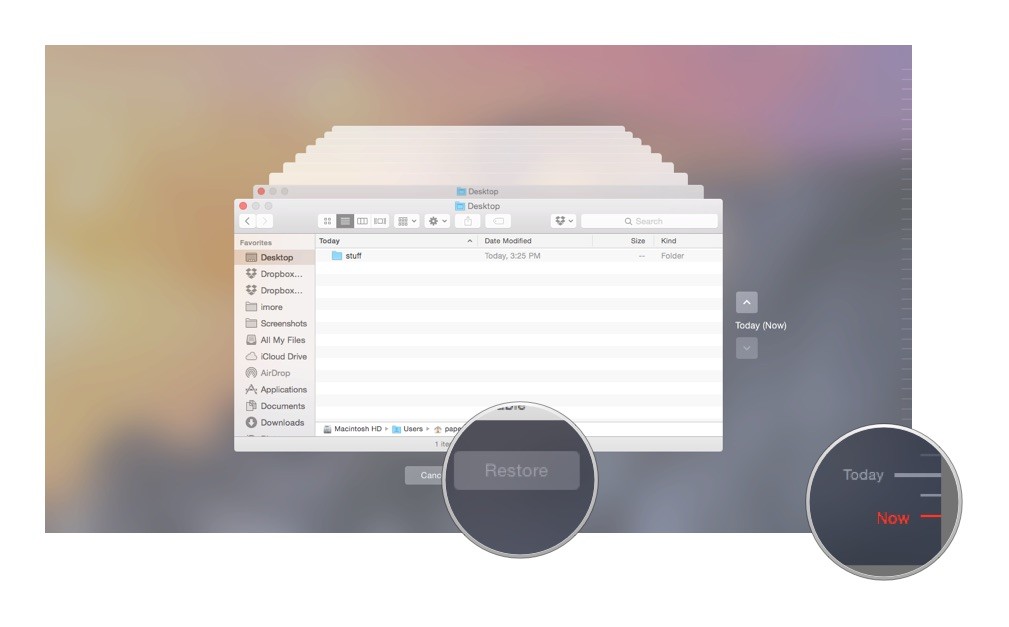
- Show Time Machine in the menu and click Enter Time Machine from the menu bar.

- Choose the backup that you want to recover and click Restore.

Recover Files from SD Card on Mac with iCloud Backup
- Login into your iCloud account on Mac.
- Check the backup files, select those files you deleted from your SD Card, then download and save to your SD Card again.
- Or, go to Settings>Advanced>Restore Files if you have deleted the backup files recently. Select the deleted files and click Restore to recover the files.

FAQ about SD Card
Transfer Files Between Different SD Cards
Using the proper way to transfer files between SD cards is necessary to ensure the data in the cards. For mac users, if you’re about to do this, you should first prepare an SD Card slot on your Mac or a commercially available SD card reader/writer, and then follow the step-by-step instructions.
- Insert the SD card into the SD card slot or an SD card reader/writer and open Finder to access the card.
- Highlight the data and drag it to the desktop.
- Eject the first SD card and insert the second SD card into the slot or reader/writer.
- Using Finder, locate and access the SD card again.
- Drag the data from the desktop to the second SD card.
Backup Data in SD Card using Mac
As we all know, traditional hard drives are made up of tiny moving parts. All it takes for a disaster to strike is for one of those parts to go awry and it’s curtains for your documents. Therefore, in order to make a backup copy of your SD card, an easy and reliable way is to use some backup software.
Surely, if you want to use a Mac instead of any other software for the backup, it is also possible to realize this by following the steps below.
- Insert your card into the card receiver and then click on “Applications” > “Utilities” > “Disk Utility”.
- Select your SD card, and click “New image”.
- In the next save options window, give your backup a name and location and let “Disk Utility” run. After a while, the finished .dmg (disk image) will be shown on the desktop. It can now be duplicated and saved as a backup of your SD card.
Safely Format Your SD Card on Mac
In general, the main reason for formatting an SD card specifically is to create a bootable startup disk, the one containing the OS that you run from. Macs can read and write to SD cards formatted for almost any device, but you may want to reformat an SD card, either to change its compatibility or to erase everything and start over. After you have connected your card to your Mac and backed up the important files to your Mac’s hard drive, you can then follow the steps to safely format your SD card on your Mac.
- Click on “Applications” > “Utilities” > “Disk Utility” or use ”Shift + Command + U” from the Finder. Choose your SD card from the list of mounted drives on the left.
- Select ”Erase” from the options across the top of the main part of the window.
- Find your desired format from the drop-down menu and then click the ”Erase” button on the bottom to start the formatting.
Conclusion
If there is no backup for the deleted files on your SD card, the best way to restore them is using a professional data recovery program like MacDeed Data Recovery, it designs a comprehensive solution for various data loss from your SD Card, USB, media player, external hard drive and other storage devices connecting to a Mac.

